
Intro
Whilst not being the most technically demanding, vocal recording can be the toughest process in music production. Probably because of the delicate nature of both the performer(s) and the human vocal cords. In addition to vocals generally being the element that is most complex and exposed in the mix. Some may say even the most important.
Preparation
With this in mind it is a good idea to get everything prepared for recording prior to the vocalist or performer(s) arriving for the session. I find this helps everybody feel at ease and comfortable from the start, and ensures that technical issues do not get in the way of creativity. This is true if I am producing or the recording engineer, I always make sure that everything is fully prepared and ready to go the instant the talent arrives.
It is always a good idea to have a printed copy of the lyrics for everybody involved in the production. Saves time. It is also a good idea to make sure there is facility for hot and cold drinks, toilet and heating/cooling if needed.
Setting Up – Recording Space
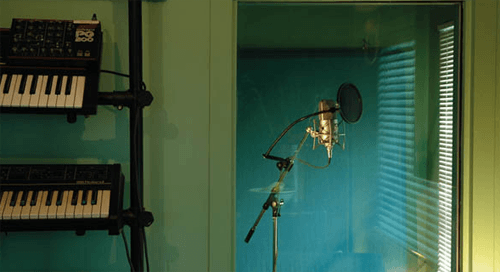
Technically and to help with the setting up process a good place to start is at the recording source and working through to the recording destination, and various monitoring destinations. So I walk out to the place where the vocals will be recorded and seemingly randomly clap my hands, and attempt to sing. Listening out for the acoustic sound and any erroneous noises that may cause problems. Which may be flutter echoes or slap echoes, noise from metallic objects, passing traffic or even creaking floorboards. Basically anything that is going to be undesirable for the recording.
I try and have an idea of the direction of the song to be recorded, which dictates the set up for recording. If it is a close mic sound then I make sure the vocal room/booth is as acoustically ‘dead’ as can be. Using acoustic baffles and any heavy materials (cushions, duvets, carpet etc) hung on walls, ceilings or floors to obtain this if necessary. There are a few commercially available products, like the SE Electronics Reflexion Filter, that can really help you get an isolated vocal sound. A good example of a very close mic sound recorded in a dead room are the verses in the song ‘Paper Tiger’ by Beck.
If it is not necessary to get such a dry sound for the voice then a slightly less ‘dead’ sound maybe required. Although I almost always end up using the Relexion Filter and having the space pretty dry sounding.
Once I’m happy with the vocal space I then setup a heavy-duty mic stand with pop shield. Making sure the pop shield is odour-free, as has not been the experience in the past! Cleaning the fabric of the pop shield with washing up liquid maybe required. On occasion I have effectively used 2 pop shields in front of the mic, especially good if looking for a close mic sound. Where the vocalist is right up against the mic grille. For regular vocal recording the pop shield is usually about 3 or 4 inches from the mic, adjacent to the capsule. It is important that all levers, rods and parts on the mic stand are tightened to the max to prevent any unwanted noise or drooping whilst recording.
Even with all this preparation in mind I always see the performance as the most important aspect of recording vocals, and sound secondary. Sometimes it is necessary to compromise the sonics of a recording to capture a better performance. Where perhaps a hand-held mic in the control room yields better results. Or being in a more open less restricting room can be more liberating and less claustrophobic.
Setting Up – Microphone Selection
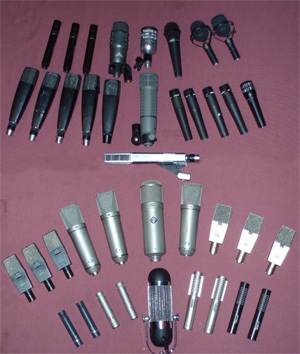
With more experience it becomes easier to judge which is the best microphone for a given singer and/or song. I typically start with a large diaphragm condenser microphone that has at least a Cardioid (most common heart-shaped setting) polar pattern, and preferably Omni as well. For the few occasions that the slightly differing frequency responses of the polar patterns can work perfectly for certain recordings.
Every microphone has not only a sonic character but also attributes that suit vocal recording better. It is good to know these qualities. For example some microphones capture singers even when they move off mic, with very little change in tonality. Other microphones are not so good for this. Some microphones set to Cardioid/ Figure of Eight have a more pronounced proximity effect, where movements closer than 6 inches to the mic can result in exaggerated bass response. Which can be used to good effect on a vocalist with a thin voice. But be aware that the proximity effect can result in vocals that don’t have a uniform tonality. The proximity effect is almost non-existent when using an Omni polar pattern.
A microphone that works well recording a male voice singly softly, may not work so well capturing a female voice at full volume. Where the more volume she projects the narrower and harder her voice gets and can result in the mic sounding edgy or harsh. An attribute of some microphones that utilise valve technology is that they have a character that softens or rounds off the sound when recording loud parts. In addition to adding harmonic overtones to the overall sound being recorded. Some microphones exaggerate sibilance and others tame it – another deciding factor in mic selection. Often when looking for a natural sound I will balance a hard sounding singer with a microphone that has a soft sound. Or vice-versa, and counter-act the difference when looking to push towards a certain tone.
If recording someone who has a quiet voice. The noise performance of the mic becomes crucial. Something some vintage mics are not so good at. Valve mics take a while to ‘warm up’ and can take up to half an hour to get to their optimum. Not good if you’re looking to put a part down quickly.
Using dynamic handheld mics such as Shure SM 58/57s or SM7s can work just right for more aggressive vocals. Liberating the vocalist with a hand held mic can really help with performance.
There is little or no point in giving specific details of which mics work in specific scenarios. It is far better to understand these differences and experience them yourself. If the situation allows I often try out 3 or 4 different mics to fathom which mic will work best in that situation. Sometimes the results are surprising. It is always good to get feedback from the artist as well.
Setting Up – Cables and Pre-Amps
Once the microphone is set up with a solid stand and pop shield I’ll then plug in any necessary power supplies or external devices. Remembering to not switch on power to the mic until after proprietary cables are connected.
When cabling from the mic into the microphone pre-amp I have found that it pays to keep the shortest route possible. I have been in recording studios where patching through lengthy studio tie-lines degrades the signal from the mic, resulting in nasty comb-filtering and a pretty horrible sound. So I’m always looking to get the cleanest route to the pre-amp and make sure all connections are solid.
Microphone pre-amp selection can be as complex as microphone selection. Prime concerns are self noise, headroom (dynamic range) and pre-amp gain. You need substantial dynamic range within the pre amp to handle the wide range that can be produced from condenser microphones in particular. Which can be more than 130 dB at certain frequencies. Every microphone pre-amp has it’s own sonic character. I try to balance this against the mic being used so they work together to achieve the tone I am looking for.
Setting Up – Compression, Equalisation and Recording
In the days of solely recording to analogue tape it was necessary to use compression to tame input dynamic range to help with the limited headroom of analogue tape. Nowadays with digital technology it is not so much of an issue, with the dynamic range at 24 bit being 144dB. Although it has to be noted that the analogue stages of an A to D converter, especially in cheaper units, often come nowhere near to this figure. Restricting your dynamic range more than you think and making you realise the fact that your signal chain is only as strong as your weakest part i.e. your converter.
The fact is that when recording vocals to a digital system, it is not technically vital to record using compression – and sometimes I don’t use compression. Most of the time I do for the reason that it can add a sense of power and strength to the sound, and help with the performance. Especially if it’s a fairly dynamic performance. It can also help when stacking vocals with harmonies so that you get an even dynamic for each voice and can easily work on the arrangement. Compression can of course be applied on playback.
I like to use compressors when recording vocals that have a fairly slow attack (10 – 40 milliseconds / RMS sensing), automatic release time, non-linear ratio and optical in character. Which almost perfectly describes the Universal Audio LA2 or Summit Audio TLA-100A. Both of these units have the ability to tailor the compression envelope to the incoming signal. If the input is sharp and staccato then the envelope is faster, if the input is slower and legato the envelope is slower. Perfect for recording vocals. Especially for catching changes in pace without readjusting the compressor.
In addition to these units I find there are a lot of compressors that work well for recording vocals. Sometimes you want for something that is fairly polite and subtle, other times you want something that is a little crunchy and aggressive. Even on some occasions I find myself riding the compressor threshold/ pre-amp gain to get a smoother response from the compressor when recording a dynamic vocal.
Some typical settings on a compressor with manual controls could be 3 – 6:1 ratio, fast to medium attack (500 microseconds to 40 milliseconds). Fast to medium release (50 milliseconds to 300 milliseconds). With an average of 3-6 dB of gain reduction on an RMS meter. Obviously reading more on a peak meter. The main thing is to adjust the compressor by feel so that it works with the dynamic of the voice and tempo of the part.
Usually before compression, but not always, I may apply a small amount of equalization to the vocal being recorded. Which typically can be a high pass filter set to 80 Hz, a low shelf EQ to remove some thickness, low mid parametric to remove muddy/boxy/nasal frequencies. Also a high shelf EQ boosting above 10 KHz can really help to open up the vocal sound without become harsh. I find cutting low frequencies before compression can help the compressor work with better at controlling dynamics without sounding unnatural. I tend to save using a ‘De-Esser’ for mixing and avoid sibilance by using the right mic and mic position.
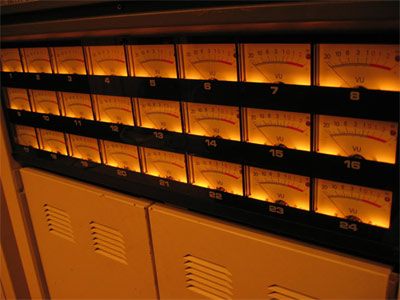
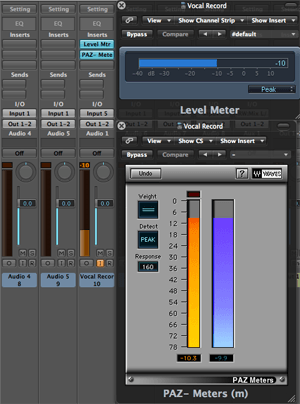
Digital audio files I record at 24 bit, with sample rates ranging from 44.1 to 96 KHz. At this point in time 44.1 KHz being the most common. When recording digitally I aim to have a reliable meter reading peaking at
-10dBfs, with the occasional peak at -5dBfs. I find working at these fairly conservative levels produces a good sound and when summed together with tracks of similar level create a reasonable output from a DAW.
I like to record with the shortest latency possible. So buffer settings are kept to a minimum. I also setup a separate headphone mix for the vocalist and give them control over the balance and volume of their headphones if viable. At least for control over the backing track, their own voice, talkback and click track if used – and if possible even more elements. Using the best, most comfortable headphones available.
I always check the headphones to make sure they sound correct, are clean and there is no issue with phase or intermittent noise. I find having a dedicated talkback mic that is switched on when the music stops is great for keeping communication open. A big time saver is to map out markers for the various sections of the song so you can quickly navigate to any part of the track.
Time to Record
With all of the above taken care of we are ready to record. It is now time to make sure once the vocalist has arrived that he/she is ready, warmed up and has whatever concoction of honey and lemon to hand. I like to initially set up the microphone capsule to be at mouth-height, and at approx 6 inches distance. Then do a quick pass to set recording and headphone levels, compression settings and start the recording process. Remembering to record everything, just in case. After this pass I ask the singer if they are comfortable, happy with the sound, headphones etc.
Once this is achieved it’s time to record the parts. There are several approaches to recording vocals. One is to record the song section by section then make a composite from the various vocal takes. Sometimes using the loop record facility on the DAW. Another is to record the song in its entirety several times and make a ‘comp’ from this. A more traditional approach is to record from the beginning and drop in when a mistake is made and carry on until the song is done. Which ever method is used I make sure everything that is recorded is labeled and comprehensively laid out. Keeping everything except the obvious blunders.
It is well worth figuring out a system of working with composite takes. I keep a kind of score card, so I have a reference of all recorded takes and notes if somebody claims to like a certain take whilst being recorded. The aim being to work as fast as possible so the process is effortless and more spontaneous and creative.
Tips and dealing with problems that arise
When recording vocals I always adhere to the performers wishes. Which may be to record in the middle of the night or sing on the roof whilst it’s raining. Obviously not using one of my microphones for the latter! I make sure that we plan ahead so as not to tire out the vocalist, and set realistic goals for what can be achieved. The human voice is delicate and can easily become temporarily or even permanently damaged. If I am working on an album project it is good to stagger the recording of the vocals so as to not wear out the vocalist by recording everything in one attempt.
Microphone height can be crucial. There is a myth in recording that the vocalist should be singing upwards with the mic capsule higher than the natural height of their mouth. This produces a thin vocal sonic (which may be perfect of course). When you see opera singers bellowing often they have their chins resting on their chests. It’s easy to sing a few notes whilst raising and dropping your head to see the tonal difference. It’s this variation in tone that we use to obtain the sound at source, and position the microphone accordingly. As mentioned before there are tonal differences when singing at various distances form the mic. Another powerful method for shaping the tone and timbre of the recording.
It always pays to be diligent when recording vocals, and be acutely aware of recording levels, compression amount, voice condition and tone. I always have a listen the vocal by itself to make sure that the headphone spill is not too loud, and for any other issues that may need dealing with.
When it comes down to it the subjects raised here are just guidelines brought about from experience. Yet they are just guidelines and fundamentally if it sounds good with the vocalist hanging upside down dressed in latex in a massive room. Then so be it. Stereo recording, using a coincident pair or M and S arrangement, can work very well – especially for backing vocals. If the signal chain ends up being, 2 compressors with 5 EQ units patched into a de-esser – but works amazingly within the track. Then there is and that is the sound.
Stay in the loop
Follow @milocostudios
Subscribe to Miloco News